
Why edge a bed at all
An edge does three jobs. University of Illinois Extension lists them: it separates the bed from the lawn, it cuts down on trimming, and it keeps mulch in the bed instead of on the grass.
Grass does not stay put. Illinois Extension notes that lawn grass creeps three to four inches into a bed every year, so any edge, bought or cut, needs some attention each season.
Landscape edging ideas by material
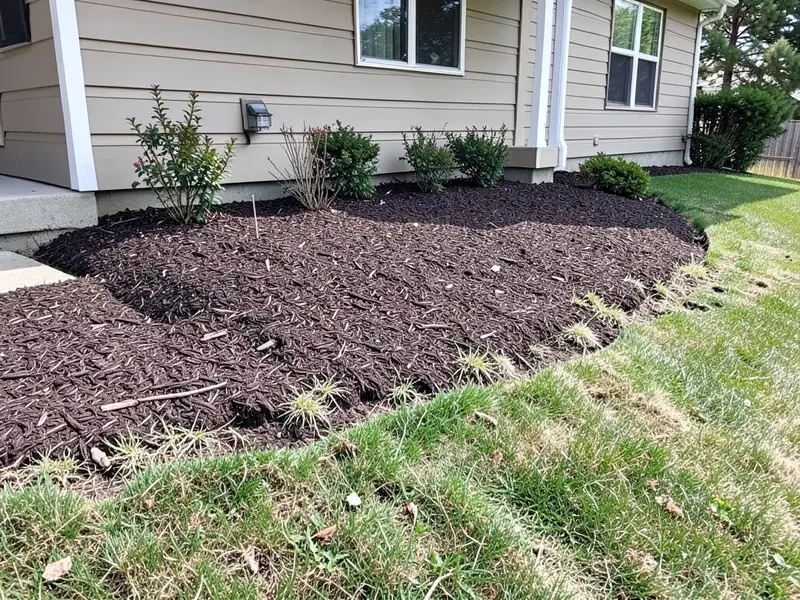
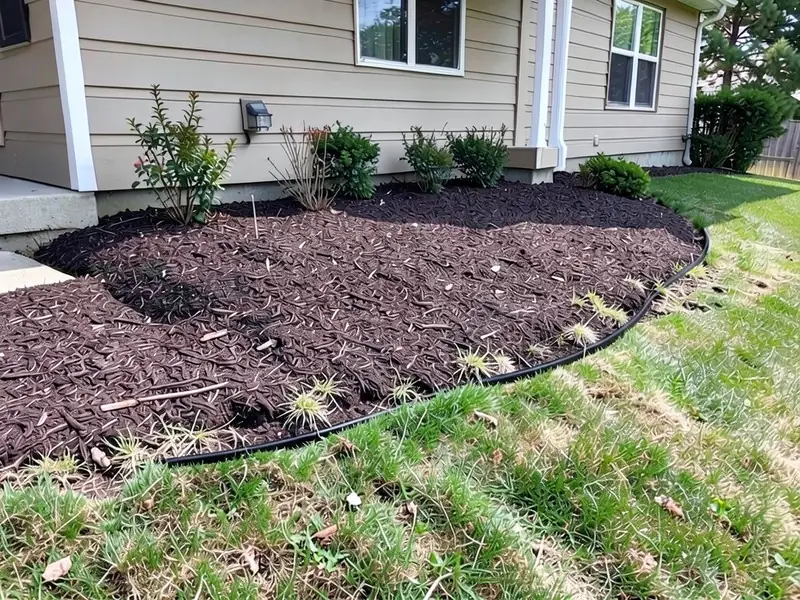
- 1. Steel or aluminum: a thin modern line: Metal edging lasts the longest, according to Illinois Extension. Steel costs more, is harder to put in and can heave with frost, so it suits places that need strong side support, such as along a driveway. Aluminum is easier to bend into curves, but its silver color can look out of place. Our first example adds black steel edging to a curved front bed.
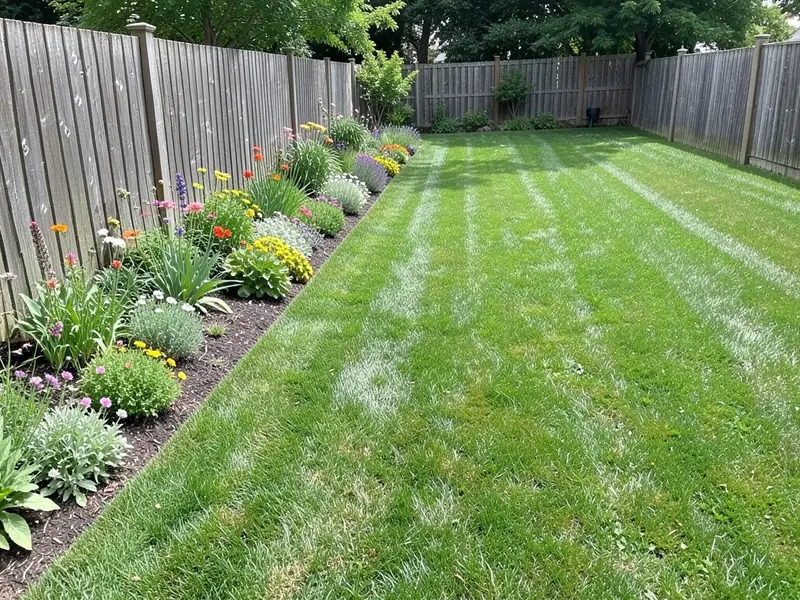
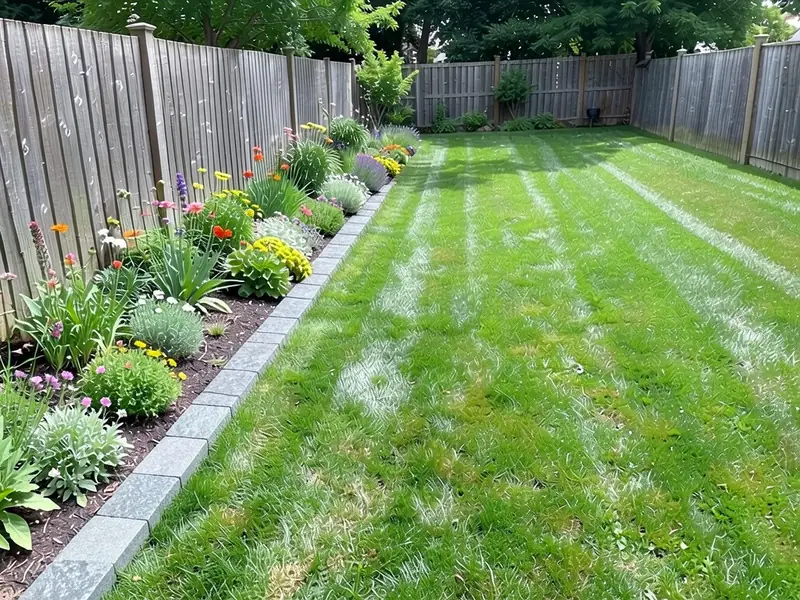
- 2. Stone blocks: sturdy and natural: A single row of cut or natural stone gives a heavy, lasting border, as in our second example. Illinois Extension suggests stone at least about three inches thick and four inches wide, set on sand or a concrete base so it stays level.
- 3. Brick or pavers: a mowing strip: Bricks or pavers laid flat give the mower wheel something to ride on, so you trim less. Illinois Extension advises well-fired brick or pavers that do not soak up water.
- 4. Concrete curbing: one continuous edge: A poured concrete curb runs as one unbroken line around a bed and doubles as a mowing edge. It is usually installed by a contractor, and it is the hardest edge to move later if the bed changes shape.
- 5. Wood or landscape timbers: cottage and rustic yards: Wood looks natural and makes a good mowing edge. Illinois Extension mentions landscape timbers, or treated boards pinned in place with rebar, and advises against old railroad ties.
- 6. A spade-cut natural edge: no materials at all: Cut a clean trench between lawn and bed with a flat spade. Illinois Extension says a trench about four inches deep and four inches wide keeps bluegrass out, and it needs re-cutting once or twice a year. It suits new beds best, because shrubs fill in and beds get bigger, and fixed edging often ends up buried or in the wrong place.
- 7. Plastic or rubber: the budget pick: Plastic is the cheapest edging and the easiest to put in. Illinois Extension lists its downsides: it is less durable, looks artificial and tends to work loose. If you use it, pick one with a rounded top, which resists sinking, and a bottom lip held with steel stakes to limit frost heave.
Edging that keeps working
Set the top of the edge just above the soil, so the mower can pass over it without catching. Keep curves wide and smooth: tight wiggles are hard to mow along and hard to keep tidy.
Mulch the bed once the edge is in. Illinois Extension suggests about an inch of mulch in flower beds and two to three inches in shrub beds, kept off the crowns of perennials.
Edging stakes and trenches are digging. 811, the national call-before-you-dig line, asks you to call a few business days before any digging project so buried utility lines can be marked first.
How to try an edging idea on your own photo
The tool above is already in Custom mode. Custom lets you name the edging material, where it runs and what must stay the same.
- Take the photo in daylight, standing on the lawn and looking along the bed, so the whole edge you want to change is in frame.
- Describe the change in the Custom Design Requirements box: the material and color of the edging, which edge it follows, and what must stay the same, such as the house, the plants, the fence and the camera angle.
- Upload your photo under Upload Your Garden Image and click Generate Custom Design. You sign in with an email code or Google when you generate.
- Compare the result with your photo. If the edging stops short or wanders, say exactly where it starts and ends, and try again.
What the AI can and cannot do
The AI shows a look: how a steel line, a stone row or a brick strip would sit against your lawn and your house, which helps you choose between materials before you buy any.
It does not measure anything or know your soil, and it does not always finish the job: in our first example it left one stretch of the curve without edging and kept the ragged grass beside the new edge. Check each result against your photo.
Edging instructions to paste into Custom mode
These are the exact instructions we used for the two examples above, in the same order. In the tool above, Custom is already selected: paste one into the Custom Design Requirements box, then upload your photo. Swap in your own material, color and what must stay.
- Add black steel landscape edging along the curved line where the lawn meets the mulch bed, a thin clean metal strip just above the soil, so the lawn and the bed have a crisp curved border. Change only the edge between the lawn and the bed. Keep the house, the camera angle, the lighting and everything else exactly the same.
- Add a border of natural gray stone blocks laid in a single low row along the front of the garden bed, between the lawn and the plants. Change only the edge between the lawn and the bed. Keep the fence, the camera angle, the lighting and everything else exactly the same.
Frequently asked questions
What is the easiest landscape edging to install?
Plastic edging is the easiest and cheapest to put in, and a spade-cut natural edge needs no materials at all. Illinois Extension notes that plastic is less durable and tends to work loose, and a cut edge has to be re-cut once or twice a year.
What is the longest-lasting edging material?
Metal. University of Illinois Extension says metal edging lasts the longest. Steel is the strongest but costs more and can heave with frost; aluminum is lighter and easier to bend.
How deep should edging be to keep grass out?
For a cut natural edge, Illinois Extension suggests a trench about four inches deep and four inches wide to keep bluegrass out. For bought edging, follow the product's own depth, and expect to pull some creeping grass each year either way.
Is a natural cut edge better than installing edging?
It is cheaper and easy to change. Illinois Extension recommends spade-cut edges for new beds, because shrubs fill in and beds tend to grow, and fixed edging often ends up buried or in the wrong place. The trade-off is re-cutting it once or twice a year.
What edging is easiest to mow along?
A flat mowing strip of brick, pavers or a concrete curb, set level with the lawn so one mower wheel can run on it. Landscape timbers also make a good mowing edge.
Do I need to call 811 before installing edging?
Yes, if you are digging or driving stakes. 811 asks you to call a few business days before any digging project so buried lines can be marked first.
Do I need an account, and is it free?
Create a free account with an email code or Google to generate. You get 1 free render, and free renders carry a watermark. More renders and no watermark come with a paid plan.