
Decide how much screening you need
Not every boundary needs a wall of green. WSU Extension describes levels of screening, from light to full: swap the lawn strip along the line for a flower bed, add a low berm or terrace walls, or plant a full screen. Start with the lightest one that does the job; it costs less and keeps the yard open.
Property line landscaping ideas
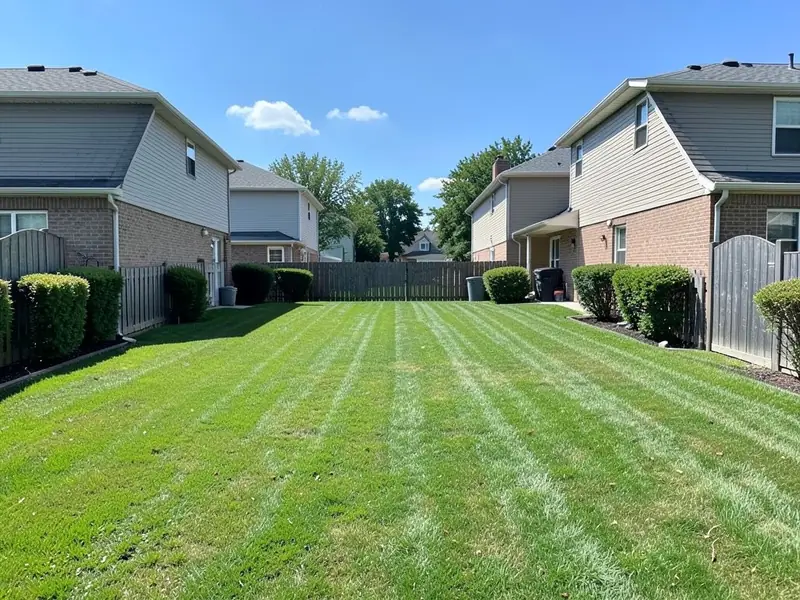
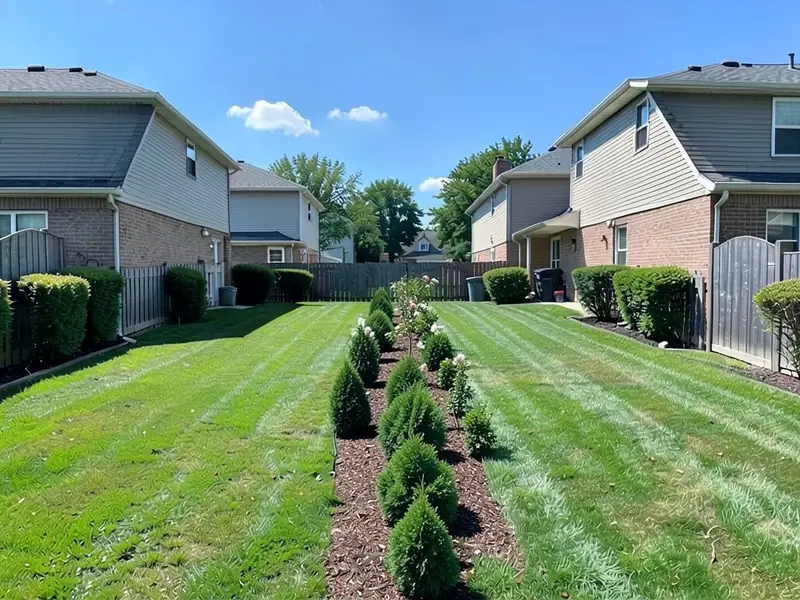
- 1. A mixed hedgerow: A row of several kinds of evergreen and flowering shrubs, as in our first example. WSU Extension recommends a mix over one species, so a pest or a bad year that hits one plant does not take out the whole screen.
- 2. A layered border: Low perennials in front, shrubs behind and a few small trees at the back. It reads as a garden from your side and still blocks the view across.
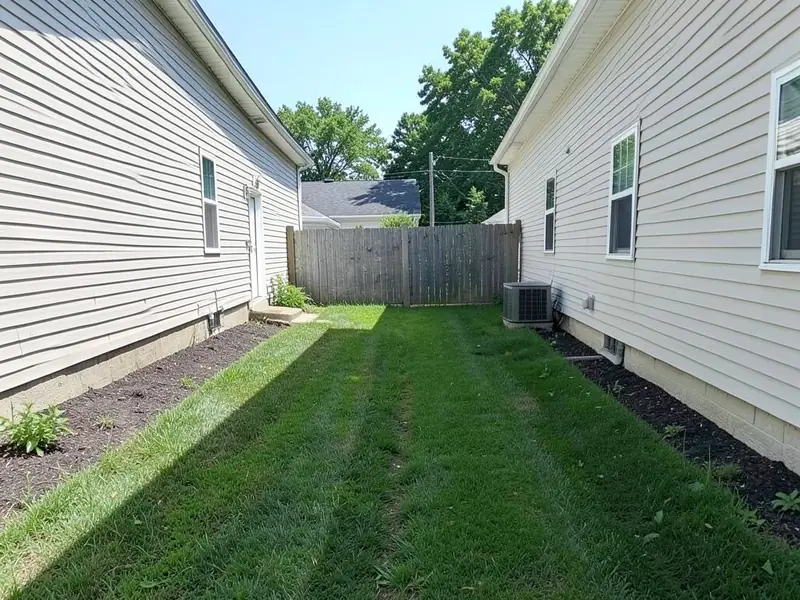
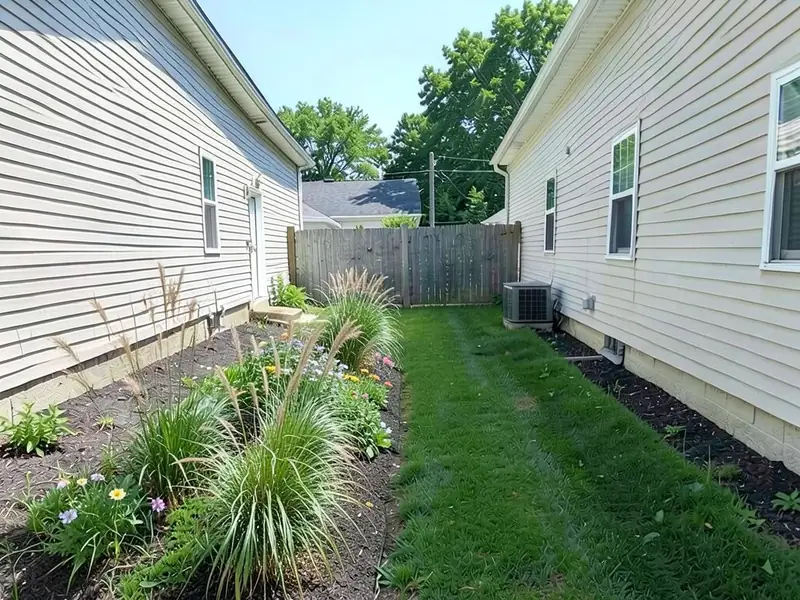
- 3. A flower or pollinator strip: Turn the mowed strip along the line into a long bed of grasses and perennials, as in our second example. It marks the boundary without blocking light or views.
- 4. A berm or low wall with plantings: A gentle mound of soil, or a low stone wall, lifts plants higher so they screen sooner. Walls and retaining walls often need a permit above a set height, so check first.
- 5. A row of narrow trees: Upright, narrow trees screen a second-story window where shrubs cannot. Check the mature width on the tag so the row stays on your side.
- 6. Plantings along a boundary fence: If there is already a fence on the line, a bed in front of it softens it. See our fence line landscaping ideas page for that.
Before you plant on a property line
- Know where the line is: If you are not sure exactly where it runs, a licensed surveyor can mark it. Planting on the wrong side is an expensive mistake to undo.
- Check local rules: WSU Extension points out that HOA, city and county rules may limit the height or type of hedges and fences. As one example, Denver needs a zoning permit for fences over four feet and for walls over a foot tall. Rules vary, so check yours.
- Keep sightlines open: WSU Extension advises against blocking drivers' views of traffic; stake out the sightline at a driveway or corner before you plant.
- Plan for the full-grown size: UF/IFAS Gardening Solutions says that if a plant needs pruning more than twice a year to fit its space, it is too crowded. WSU suggests spacing screen plants at least about two feet apart, three or more preferred, and shaping hedges wider at the base than the top.
- Shared trees: Under Ohio law, a tree that sits on the line is generally owned by both neighbors and should not be removed without the other's consent, while branches hanging over your side can usually be trimmed with care, according to Ohio State's farm office. Rules vary by state; check yours.
- Call 811: Planting trees and shrubs and setting posts all count as digging. 811 is a free national service: call a few business days ahead and the utility lines are marked with paint or flags.
How to try an idea on your own boundary
The tool above is already in Custom mode. Custom lets you say where the boundary runs, what to plant there and what must stay the same.
- Take the photo in daylight, standing at one end of the boundary and looking along it, so the strip you want to plant is in frame.
- Describe the change in the Custom Design Requirements box: where the planting goes (for example, down the middle of the lawn or along the left edge), what to plant, and what must stay the same, such as both houses, the fence and the camera angle.
- Upload your photo under Upload Your Garden Image and click Generate Custom Design. You sign in with an email code or Google when you generate.
- Compare the result with your photo. If the bed lands in the wrong place, as it did in our second example, name a landmark it should follow and try again.
What the AI can and cannot do
The AI shows a look: how a hedgerow or a planted strip would sit between your yard and the next, which helps you decide how much screening you want and talk it over with your neighbor.
It does not know where your property line is, what your local rules allow or how wide a plant will grow, and it can put the planting in the wrong place. Treat the picture as an idea, and check the line and the rules before you plant.
Property line instructions to paste into Custom mode
These are the exact instructions we used for the two examples above, in the same order. In the tool above, Custom is already selected: paste one into the Custom Design Requirements box, then upload your photo. Say exactly where your boundary runs in the picture, and swap in your own plants.
- Add a natural property-line planting down the middle between the two yards: a staggered row of evergreen shrubs and a few small flowering trees in a mulched bed, so the two yards feel separate. Change only the strip along the property line. Keep both houses, the camera angle, the lighting and everything else exactly the same.
- Turn the strip along the property line into a long narrow planting bed of tall ornamental grasses and flowering perennials with mulch, leaving a lawn path beside it. Change only that strip. Keep both houses, the camera angle, the lighting and everything else exactly the same.
Frequently asked questions
How close to the property line can I plant?
It depends on local rules and on how wide the plant will grow. Place each plant so its full-grown width stays on your side, and check your city, county and HOA rules. UF/IFAS notes that a plant needing pruning more than twice a year to fit is too crowded.
Do I need a permit for a fence or wall on my property line?
Often, above a certain height. Rules are set locally: Denver, for example, needs a zoning permit for fences over four feet and walls over a foot tall. Check with your city or county and your HOA before you build.
Who owns a tree that sits on the property line?
Under Ohio law it is generally owned by both neighbors and should not be removed without the other's consent, according to Ohio State's farm office. Rules vary by state, so check yours.
Can I trim my neighbor's branches that hang over my yard?
Usually, with reasonable care, in many places. Ohio State's farm office describes this under Ohio law. Rules vary by state, and harming the tree can bring damages, so check local law first.
What is the best planting for privacy along a property line?
A mix of evergreen and flowering shrubs, rather than one species. WSU Extension recommends a mixed hedgerow so one pest or stress cannot take out the whole screen, with plants spaced about two to three feet apart or more.
Do I need to call 811 before planting along a property line?
Yes. Planting trees and shrubs and setting posts count as digging. 811 is free; call a few business days ahead and the utility lines will be marked.
Do I need an account, and is it free?
Create a free account with an email code or Google to generate. You get 1 free render, and free renders carry a watermark. More renders and no watermark come with a paid plan.